GatsbyJS with Netlify
May 02, 2019
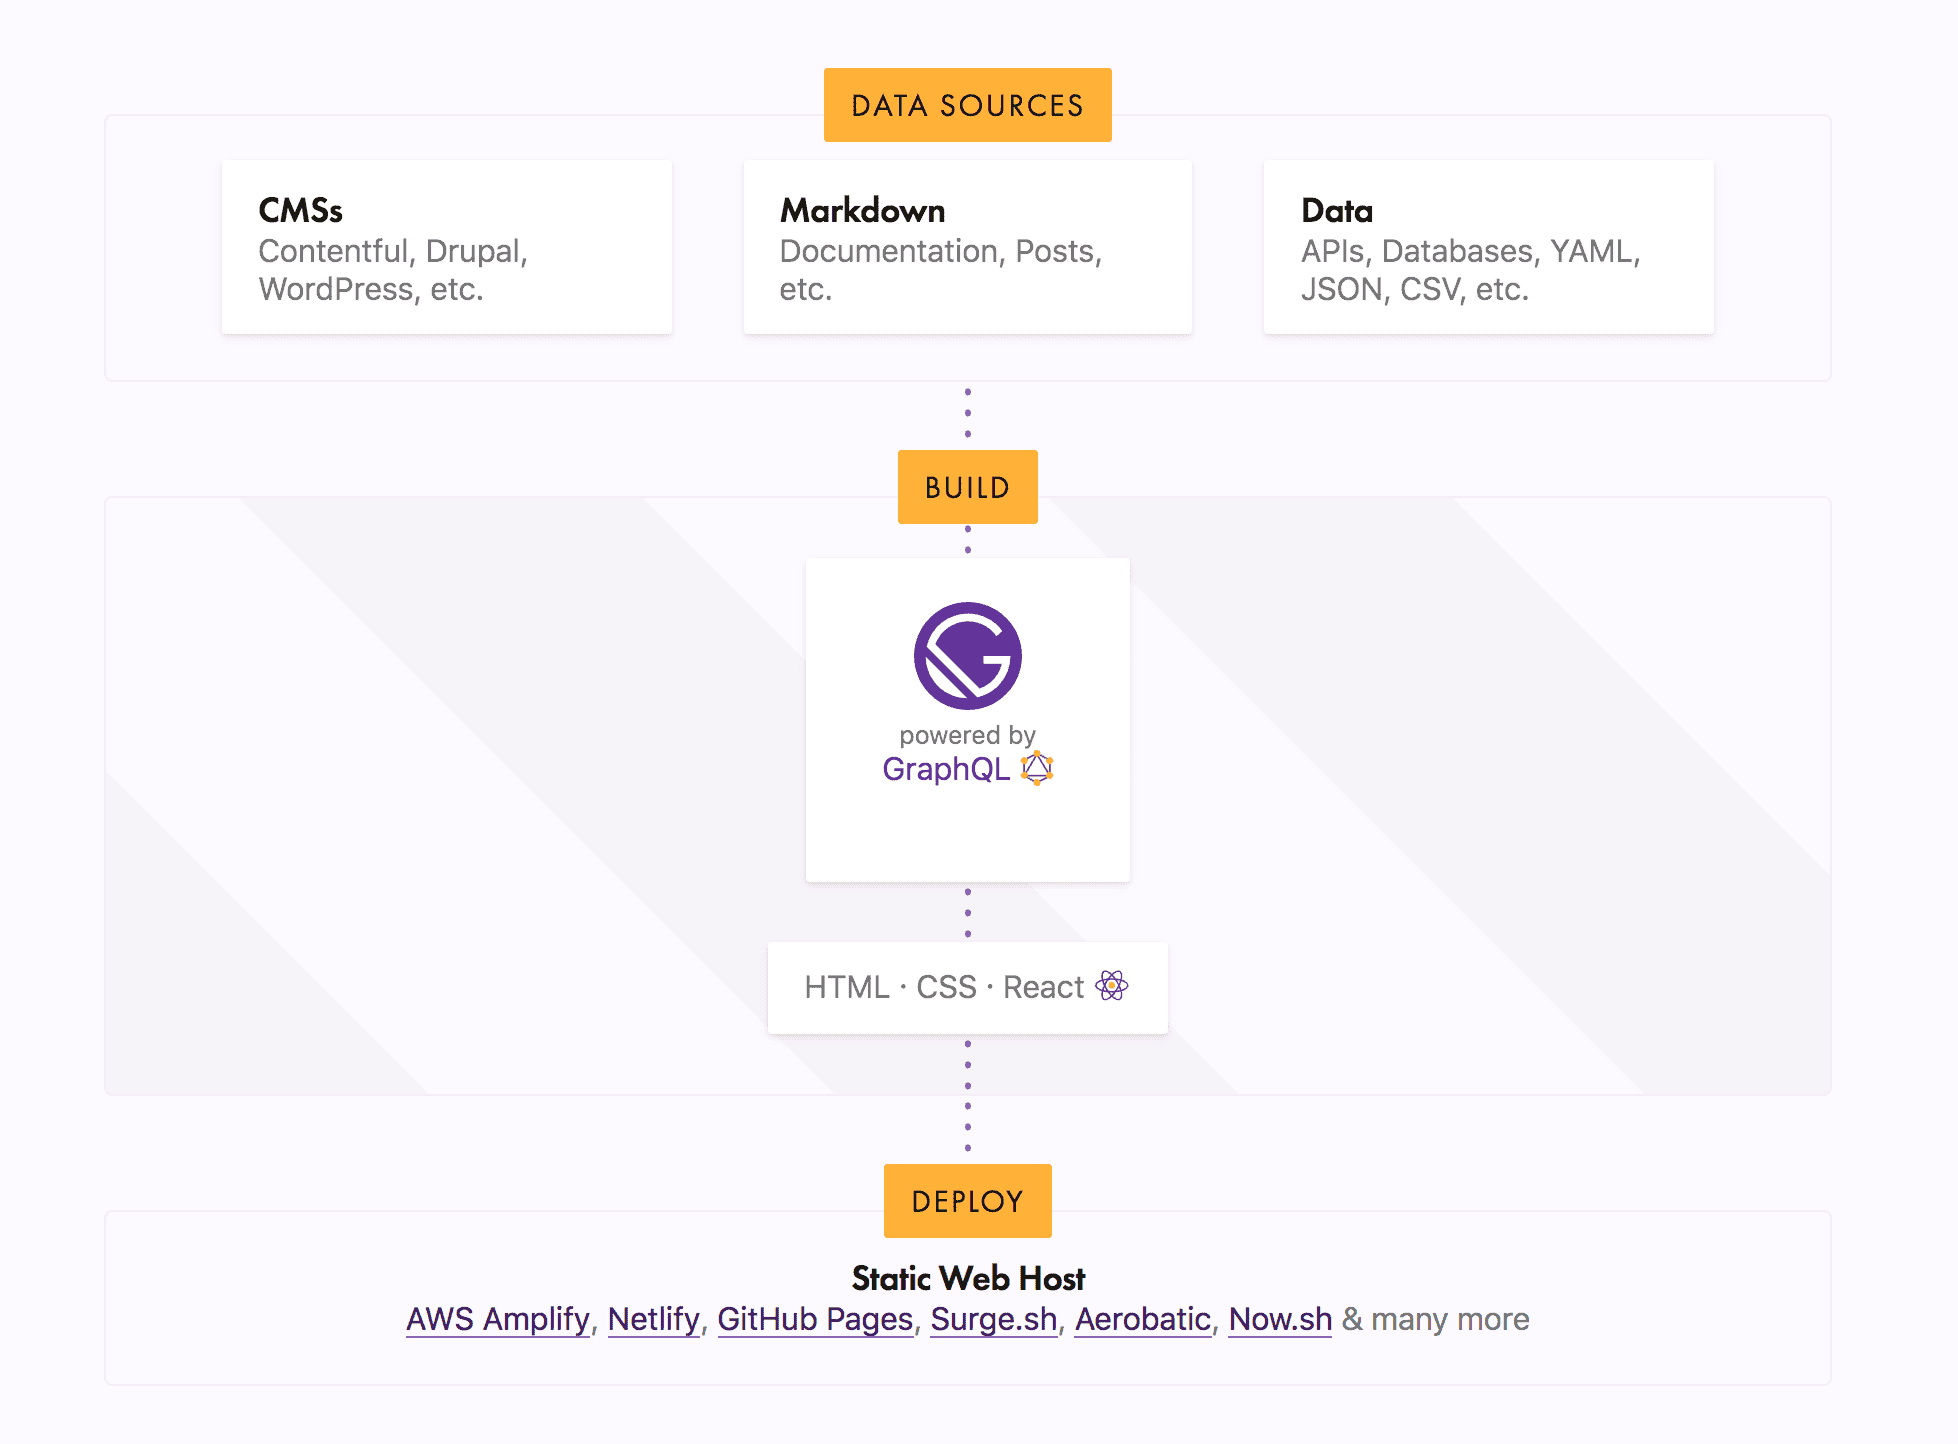
What is it?
- Static site generator built on React
- Pull data from markdown, text, apis
- Takes data and creates super fast sites
Why should I use it?
- Tonnes of starter packs
- Massive set of plugins
- Excellent documentation (great react intro)
- Fast + SEO optimized
- Entire directory already scafolded in starters
Features
- No webpack set up needed
- Supports graphql out of the box
- Routing comes included
- Hot Reloading
- Cloud functions
- Form submissions
Plugins - Tell me more
-
Plugins for
- seo (react helmet)
- lazy load images
- scss loader
- google fond loader
- markdown formatting
- Think of plugins as a way to remove monsterous webpack configs
Example:
npm install --save gatsby-transformer-remarkThen in your gatsby-config.js:
plugins: [
  {
    resolve: `gatsby-transformer-remark`,
    options: {
      // CommonMark mode (default: true)
      commonmark: true,
      // Footnotes mode (default: true)
      footnotes: true,
      // Pedantic mode (default: true)
      pedantic: true,
      // GitHub Flavored Markdown mode (default: true)
      gfm: true,
      // Plugins configs
      plugins: [],
    },
  },
],
… I have my gatsby site, now what?

Netlify
- Hosting for static sites
- Free ssl (needed for .dev)
- Watch your repo + deploy
- Branches can deploy to a url
- Live stream local dev to test url
- Hook up to dns to allow for easy creation of subdomains, reverse proxy
Deploy

-
Download your repo and install
npm install -g gatsby-cli git clone https://github.com/{userName}/gatsby-starter-blog.git cd gatsby-starter-blog/ npm i vscode . gatsby develop -
Create a page - add file under
pagesimport React from 'react' export default () => { return <h1> Welcome to my site </h1> }; -
Push to repo
git add . git commit -m "my first page" git push origin master - Go back to netlify site to view deploy
